Note
Go to the end to download the full example code.
12.1.10.5.19. Mask editor#
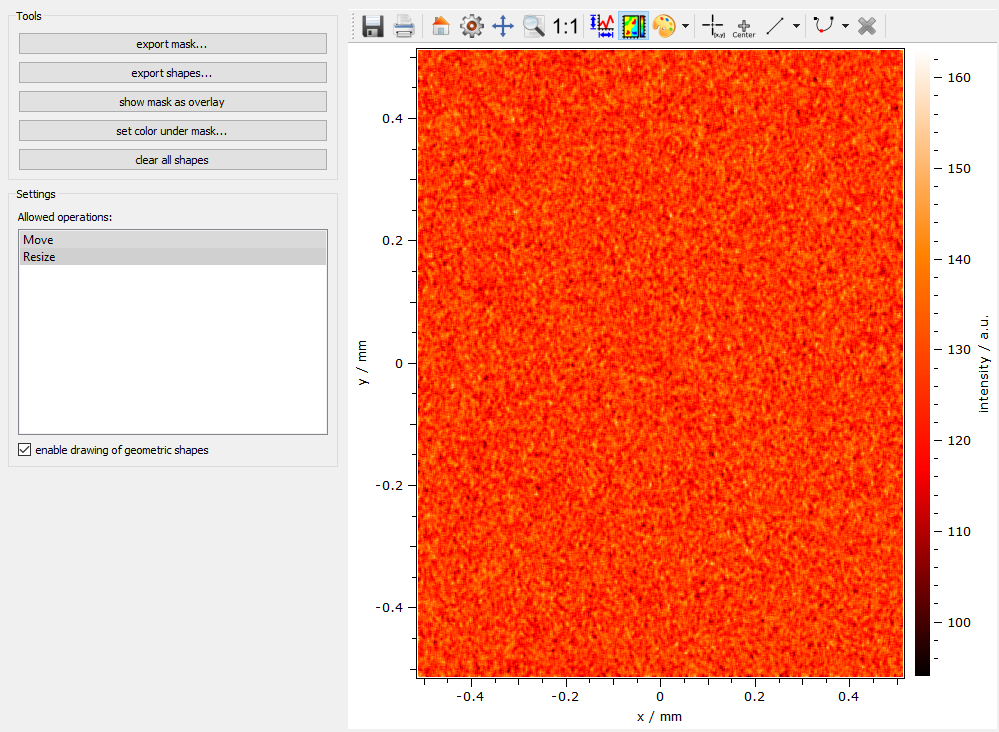
This demo shows a mask editor where a masked dataObject can be
created from shapes that are drawn on the plot canvas. The result
of such shapes is a list of itom.shape objects. These are sub-pixel
precise geometric shapes. They can then be converted to pixel-precise
masks. For more information about shapes see the shapes demo in the main
folder of the demo scripts.
from itom import ui
from itom import dataObject
from itom import algorithms
from itom import shape
Controls if the user can add or modify shapes by the actions in the toolbar
def checkEnableDrawingClicked(checked: bool):
    gui.plot["geometricShapesDrawingEnabled"] = checked
Clear all existing shapes by calling the slot clearGeometricShapes
def clearShapes():
    gui.plot.call("clearGeometricShapes")
Creates a mask where all values within the mask are set to 255 and
all other values to 0. The mask has the same size and axes information
than the displayed dataObject.
The mask object is then set to the variable mask in the global workspace
and displayed in a new plot window.
def exportMask():
    mask = gui.plot["source"].createMask(gui.plot["geometricShapes"])
    globals()["mask"] = mask
    plot(mask, properties={"title": "exported mask"})
Exports all current shapes as a list of itom.shape objects.
def exportShapes():
    globals()["shapes"] = gui.plot["geometricShapes"]
    ui.msgInformation(
        "shapes exported",
        "shapes exported to the workspace under the variable 'shapes': \n"
        + str(globals()["shapes"]),
    )
Show the mask object as overlay image. Use the slider in the toolbox of the plot to change the transparency of the overlay image.
def showMaskAsOverlay():
    mask = gui.plot["source"].createMask(gui.plot["geometricShapes"])
    gui.plot["overlayImage"] = mask
Sets all values within any shapes to a given gray value.
def setColorUnderMask():
    [val, ok] = ui.getInt(
        "value", "set the value for all values within the mask:", 128, 0, 255
    )
    if ok:
        mask = gui.plot["source"].createMask(gui.plot["geometricShapes"])
        # the mask can be inverted using ~mask
        gui.plot["source"][mask] = (
            val  # this single command can be used to change values in the mask
        )
        gui.plot.call(
            "replot"
        )  # if only the source object is changed, you need to call
        # ``replot`` such that the plot is updated, too.
This method is always called if any shape is added or modified and displays some information in the status bar of the window.
def shapeModified(index: int, shape: shape):
    gui.call("statusBar").call(
        "showMessage", "Shape %i modified: %s" % (index, str(shape)), 1000
    )
This method is called if the user changes the selection of allowed operations.
def listModificationChanged():
    sel = gui.listModificationTypes.call("selectedRows")
    sel2 = []
    if 0 in sel:
        sel2.append("Move")
    if 1 in sel:
        sel2.append("Resize")
    gui.plot["geometryModificationModes"] = ";".join(sel2)
Create demo data with axis scales and offsets to show that the mask will also work in this special case.
image = dataObject.randN([1024, 1024])
image.axisScales = (1e-3, 1e-3)
image.axisOffsets = (512, 512)
image.axisUnits = ("mm", "mm")
image.axisDescriptions = ("y", "x")
image.valueUnit = "a.u."
image.valueDescription = "intensity"
algorithms.lowPassFilter(image, image, 7, 7)

gui = ui("demo_MaskEditor.ui", ui.TYPEWINDOW)
# connect signal-slots
gui.checkEnableDrawing.connect("toggled(bool)", checkEnableDrawingClicked)
gui.btnExportMask.connect("clicked()", exportMask)
gui.btnExportShape.connect("clicked()", exportShapes)
gui.btnShowMaskOverlay.connect("clicked()", showMaskAsOverlay)
gui.btnSetColorUnderMask.connect("clicked()", setColorUnderMask)
gui.btnClearShapes.connect("clicked()", clearShapes)
gui.plot.connect("geometricShapeChanged(int,ito::Shape)", shapeModified)
gui.listModificationTypes.connect("itemSelectionChanged()", listModificationChanged)

gui.plot["source"] = image
gui.plot["colorMap"] = "hotIron"
gui.listModificationTypes.call("selectRows", (0, 1))
gui.show()

Total running time of the script: (0 minutes 0.042 seconds)
